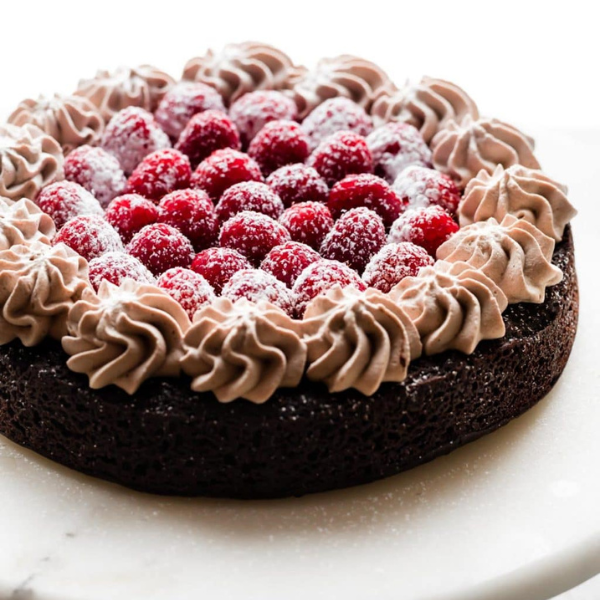
Flourless Chocolate Cake

This flourless wonder delivers an intense chocolate experience, boasting a dense, fudgy center and a slightly crinkled top. With no flour, it's naturally gluten-free and caters to those with dietary restrictions. Unlike traditional cakes, it's surprisingly simple to make, requiring minimal ingredients and prep time. So go ahead, treat yourself to a slice of pure chocolate heaven without the guilt!

Yields:

8 servings

Prep Time:

15 Mins

Cook Time:

30 Mins

Total Time:

3 Hours

Ingredients

1/2 cup (8 Tbsp; 113g) unsalted butter

6 ounces (170g) high quality semi-sweet chocolate, finely chopped

2/3 cup (135g) granulated sugar

2 teaspoons espresso powder

1 and 1/2 teaspoons pure vanilla extract

4 large eggs, at room temperature

1/3 cup (27g) unsweetened natural or dutch-process cocoa powder

1/8 teaspoon salt

optional: 1/2 teaspoon baking powder


For Mocha Whipped Cream

1 teaspoon warm water

1 cup (240ml) cold heavy cream or heavy whipping cream

3 Tablespoons (22g) confectioners’ sugar 

1 Tablespoon (6g) unsweetened natural or dutch-process cocoa powder

optional: raspberries and a dusting of confectioners’ sugar

Instructions

  1. Prepare an 8-inch round cake pan. (A 9-inch cake pan works, but the cake is thinner.) Always line your round pans with parchment paper rounds before adding the batter. Grease the pan, line with a parchment paper round, then grease the parchment paper. Parchment paper helps the cake release seamlessly from the pan. This cake will stick if you don’t use greased parchment. 
  2. Melt chocolate and butter together.
  3. Whisk in the sugar, espresso powder, and vanilla then whisk in the eggs.
  4. Whisk in the dry ingredients and pour batter into cake pan.
  5. Create a steamy oven. This is an egg heavy cake and, like cheesecake, it needs a moist environment to prevent it from drying out.  We don’t need a water bath, instead place a large metal roasting pan on the bottom oven rack. Fill with hot water. Place cake on the center rack. Quickly shut the oven door trapping steam inside.
  6. Bake in the steamy oven. Takes about 30 minutes.
  7. Cool the cake for only 10 minutes, then invert it onto your serving plate. This is important! Run a sharp knife around the edges of the warm cake to help release it.
  8. Cool completely. 
  9. Whip heavy cream, sugar, cocoa powder, and espresso mixture until stiff. Top your dessert with this delicious mocha whipped cream!
  10. Just stick it in the refrigerator for 1-2 hours. Decorate and serve!

Side Notes:

  1. Make-Ahead & Freezing Instructions: Prepare recipe through step 4 up to 1 day in advance. Cover and store in the refrigerator until ready to bake. Continue with step 5. Since it’s cold, the cake batter will take a few extra minutes to bake. To freeze—invert and cool cake as directed. Wrap with 2 layers of plastic wrap and 1 layer of aluminum foil. Freeze for up to 3 months. When ready, thaw overnight in the refrigerator, then bring to room temperature before decorating/serving.
  2. Special Tools): 8-inch Round Pan | Glass Mixing Bowls | Whisk | Double Boiler | Electric Mixer) | Cooling Rack | Piping Bag  | 849 Piping Tip | Fine Mesh Sieve.
  3. Chocolate: Use 6 ounces of “baking chocolate” bars found in the baking aisle. They’re sold in 4 ounce bars, so you’ll need 2. (You’ll have 2 ounces leftover for another use.) 
  4. Espresso Powder: Adding this help in deepen the chocolate flavor
  5. Baking Powder: Adding  *a little* extra lift to this normally flat cake.
  6. Confectioners’ Sugar:  Prefer a sweeter whipped cream, increase confectioners’ sugar to 1/4 cup (4 Tbsp; 30g).
  7. 8 Inch Cake Pan: 8-inch cake pan(recommended). A 9-inch cake pan works, but the cake is thinner. The bake time will be a couple minutes shorter in a 9-inch cake pan.

Nutritional Info

Calories

250

Fat

18 G

Cholest

60 MG

Sodium

200 MG

Carbs

20 G

Fiber

1 G

Protein

4 G

Please note that these values are approximate and can vary based on factors such as specific ingredient brands, portion sizes, and any modifications made to the recipe. The information does not include optional ingredients.